Eye Spy: A Night Vision Camera with a Raspberry Pi
Can't see in the dark? Me neither. But there's a good chance that your camera can. Camera sensors are sensitive to infrared light, which is invisible to the human eye. Most cameras include a filter specifically to block it out, because leaving it in distorts colours in normal photography. Remove that filter, add an infrared light source, and you have a night-vision camera.
This IR sensitivity isn't something engineers added to camera sensors; it's an inherent property of silicon, the material sensors are made from. The filter exists purely to make images look the way human eyes expect them to look. Remove it, and you're exposing what the sensor was always capable of.
The camera
The Raspberry Pi NoIR camera module is the key component. 'NoIR' means it ships without the infrared-cut filter, leaving the sensor sensitive well beyond the visible spectrum. We used the same camera when it was first released to make an infrared camera,
At around $25 for a 12-megapixel sensor, that works out to roughly $2 per megapixel. For context: the 1994 Apple QuickTake 100, one of the first consumer digital cameras, cost around $750 at launch for a 0.3MP sensor, putting it in the neighbourhood of $2,000 per megapixel. The same capability now costs a thousand times less.
Price per Megapixel ($)
In this build, the NoIR module is paired with a Raspberry Pi 5, and all the Linux desktop screenshots in the video are running on the Pi 5. One practical note: the NoIR camera ships with a 15-pin ribbon cable that only fits the Pi 3 and Pi 4. If you're using a Pi 5 or Pi Zero, you'll need a separate 22-pin cable.
The light source
Photography literally means "light writing" and infrared photography is no different. You still need light; it just has to be the invisible kind.
For this build, we connected twenty 830-nanometer, 3-watt LEDs in series, driven by a constant-current power supply. Constant current rather than constant voltage matters here: LEDs driven at a stable current produce stable brightness, which means less flicker in your video footage.
830nm sits in the near-infrared range, well outside what human eyes can detect (roughly 380 to 700nm is the visible spectrum), but well within the sensitivity range of the unfiltered CMOS sensor.
The experiment (see video)
To show exactly what the camera is doing, we ran a side-by-side comparison using two cameras simultaneously:
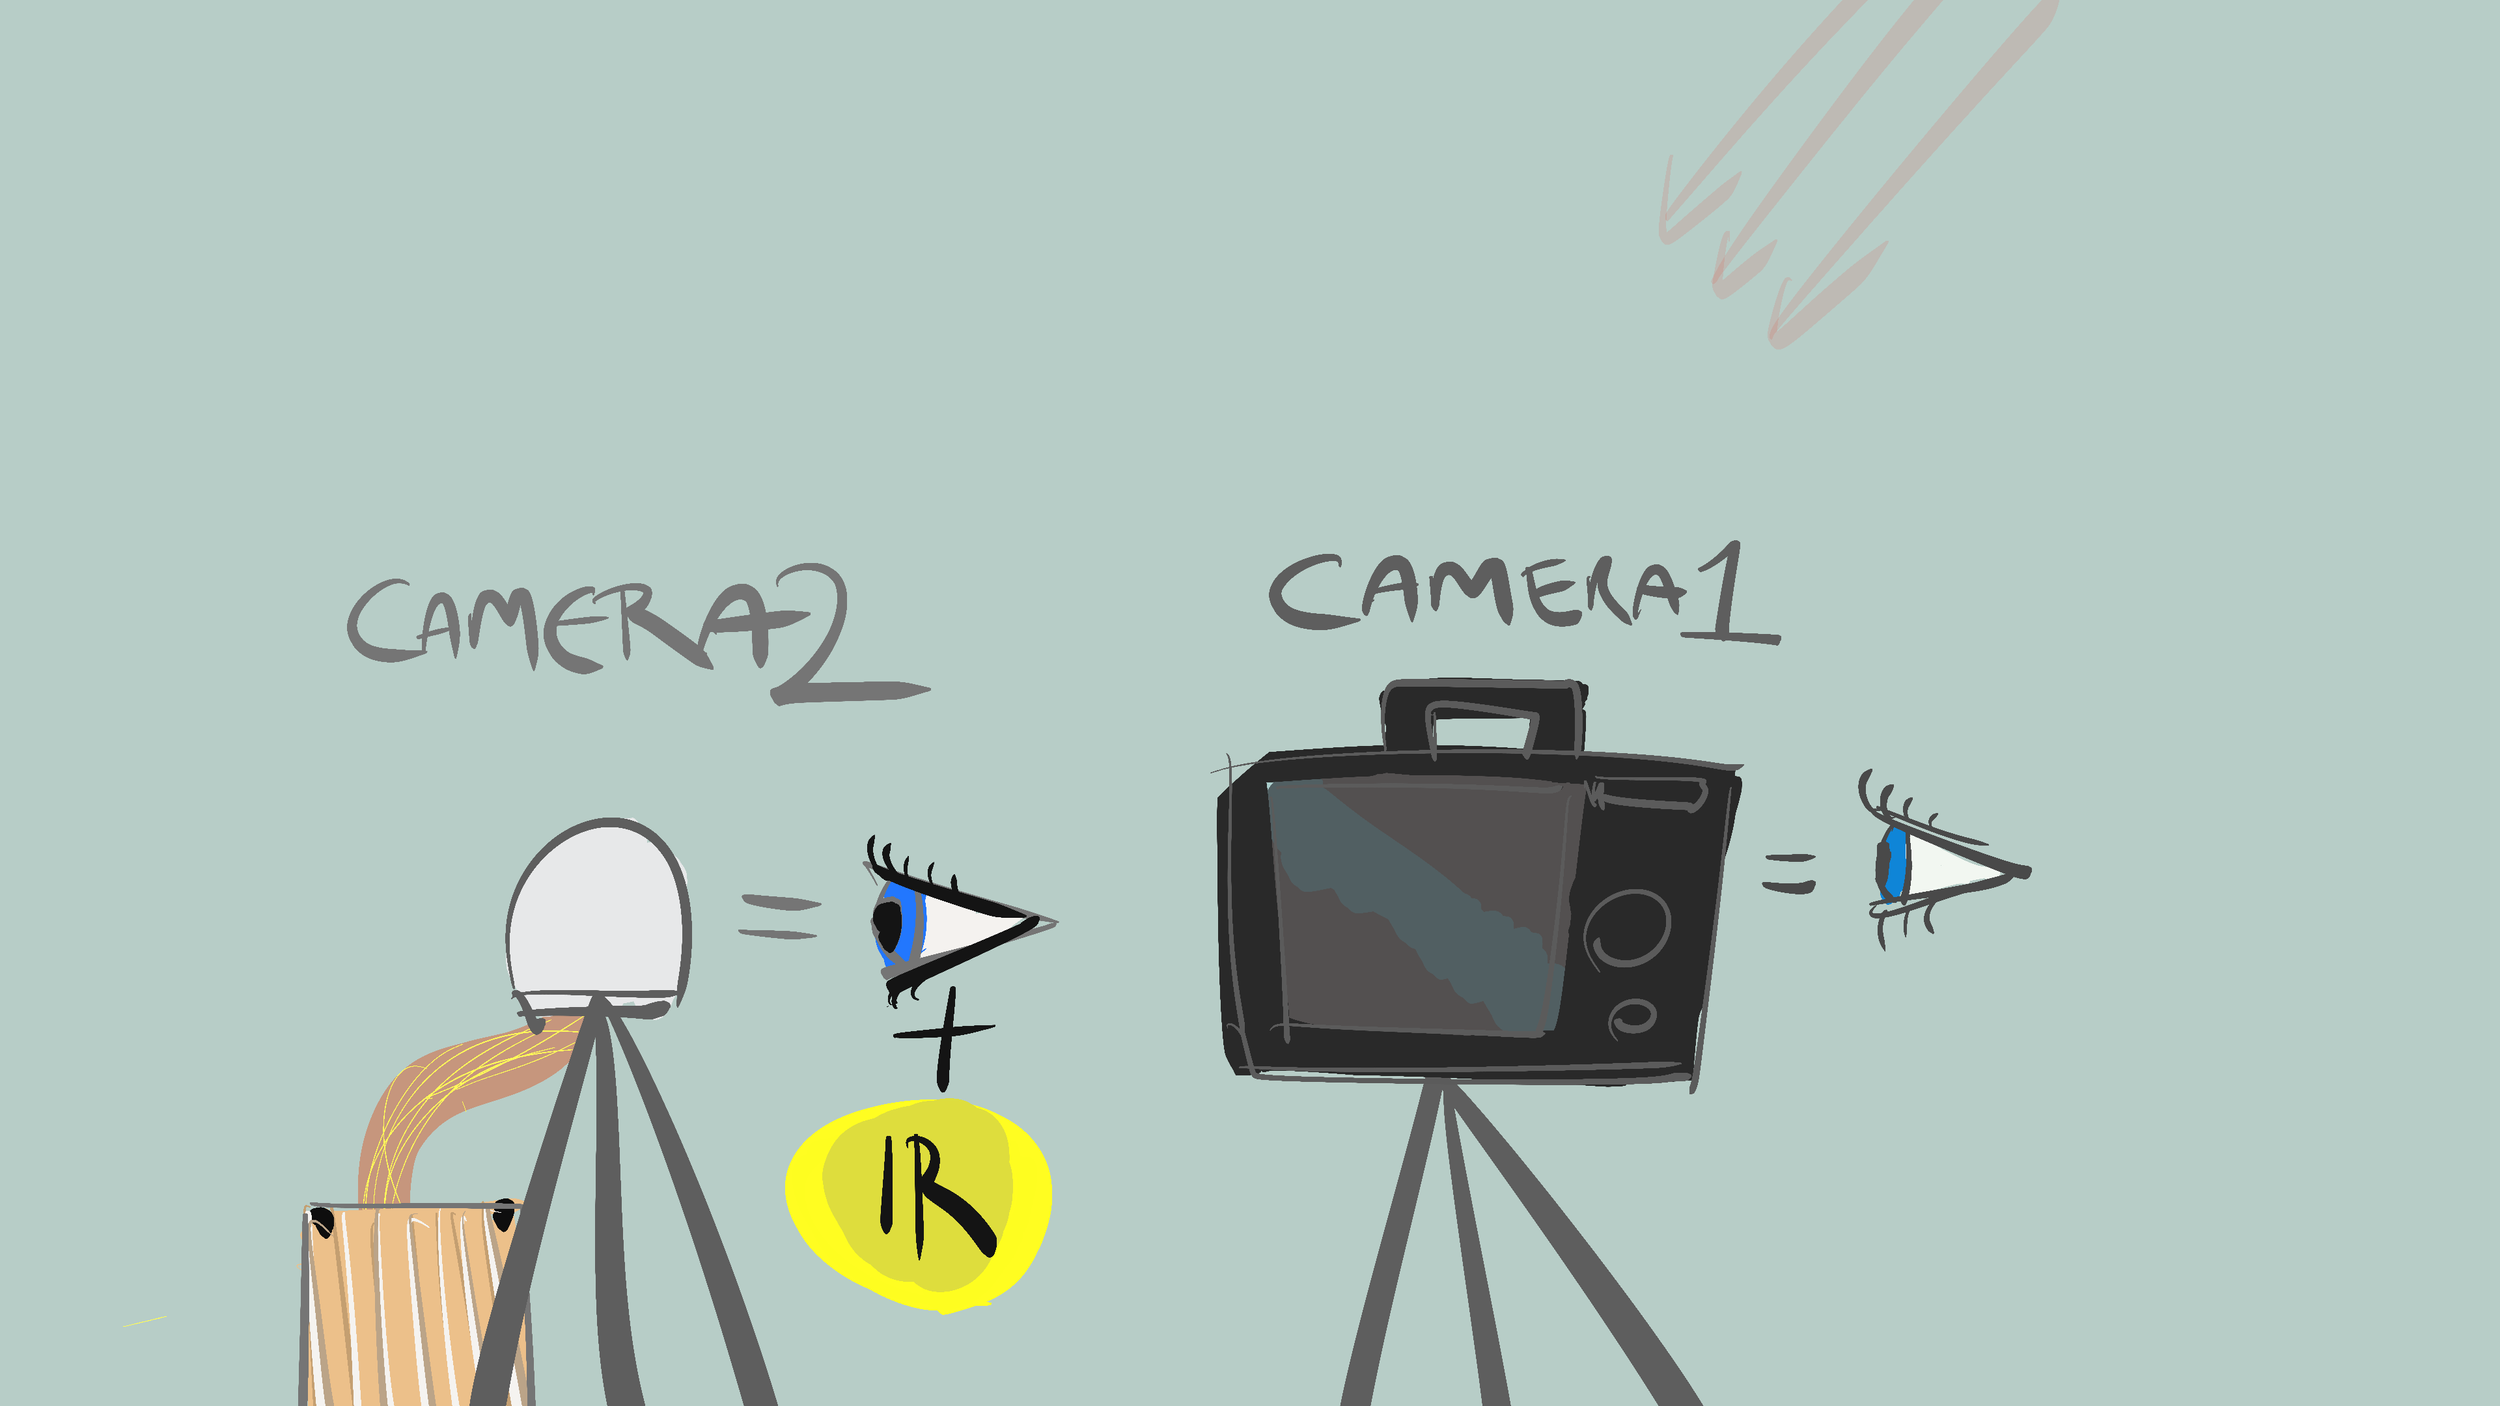
Camera 1: a conventional camera with a standard IR-cut filter, representing what a human eye sees.
Camera 2: the Raspberry Pi NoIR camera, sensitive to both visible and infrared light.
The subject was lit from a single direction by two combined sources: a broad-spectrum white light and the 830nm IR LEDs. Halfway through the recording, the white light was switched off, leaving only the infrared LEDs running.
The result: Camera 1 goes dark. Camera 2 barely changes.

Because the IR illumination is directional rather than diffuse, the result is a crisp, detailed image, not the blurry grey smear you might associate with cheap night-vision setups.
IR quirks worth knowing
Plants appear white. Healthy vegetation reflects near-infrared light strongly, a phenomenon known as the "red edge" in remote sensing. This is why farmers have used infrared aerial photography for decades to assess crop health: stressed or dying plants reflect less IR and show up darker.
Sunglasses offer little cover. Most consumer sunglasses block UV and reduce visible light, but transmit infrared fairly well. Under IR illumination, dark glasses may offer almost no concealment to a security camera of this type.
The mount
The camera sits in a 3D-printable "all-seeing eye" mount based on the Eye of Providence, the symbol of a single eye enclosed in a triangle that appears on the US dollar bill and has accumulated centuries of religious, Masonic and conspiracy theory lore. It felt like the right home for a camera that sees in the dark. STL files are linked in our GitHub repository, along with everything else you need to build your own.
Build it yourself
All the components are linked in the description: the camera module, the ribbon cable for Pi 5/Zero users, the LEDs, the constant-current power supply, and the 3D-printable mount.
Watch the video: